Epoxy coating is a mix of polymer resins and hardeners. When applied to concrete flooring, epoxy creates a smooth, shiny surface that brightens the space. The durable and visually stunning finish makes it suitable for most residential and commercial applications. If you’re looking for suitable flooring types for your home, epoxy flooring should be high on your list.
It’s impervious to most chemicals and has antimicrobial properties. It can also mimic the elegant feel of marble while maintaining the hardiness of concrete.
An epoxy coating is a compound chemical mixture consisting of two elements. They combine to form a thick, tough finish you can apply to various surfaces to protect them and make them look more attractive. The two primary components of an epoxy coating are epoxy resin and a polyamine hardener catalyst. For example, epoxy coatings for concrete floors are commonly used in Australia as a durable, attractive epoxy garage floor coating.
Understanding Epoxy Floor Coatings
Epoxy coating can be roughly divided into three types: solvent-based, water-based and 100% solid epoxy. More recently, you can find pre-tinted or metallic coatings, as well. Solvent-based epoxy is the oldest type. It’s a mix of resin with a high concentration of solvent-based hardener.
When left to evaporate after application, mixed resin and hardener generate toxic vapours, such as ammonia and carbon monoxide. To protect yourself from the fumes, wear a respirator during and after application.
Next, you have water-based epoxy. It produces the same glossy finish as solvent-based epoxy but is soluble in water, so there’s no need for a solvent hardener. It doesn’t leave harmful fumes but creates a sturdy, non-toxic, waterproof surface.
Third, there’s 100% solid epoxy, which doesn’t need to be mixed with solvent or water. It’s also more resistant to abrasion and chemicals compared to water-based coatings. But, because of its viscosity, you cannot apply this in thin coats. It also dries rather quickly, so you need to work fast when using it. So, again, it’s better to let a professional handle this type of epoxy paint.
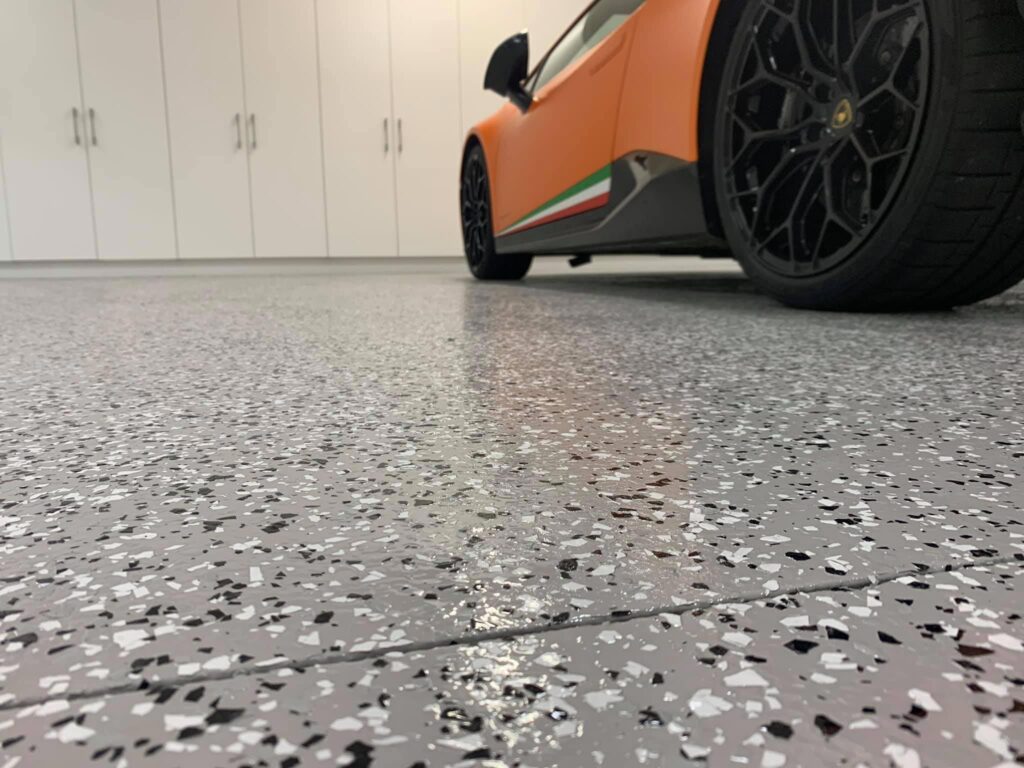
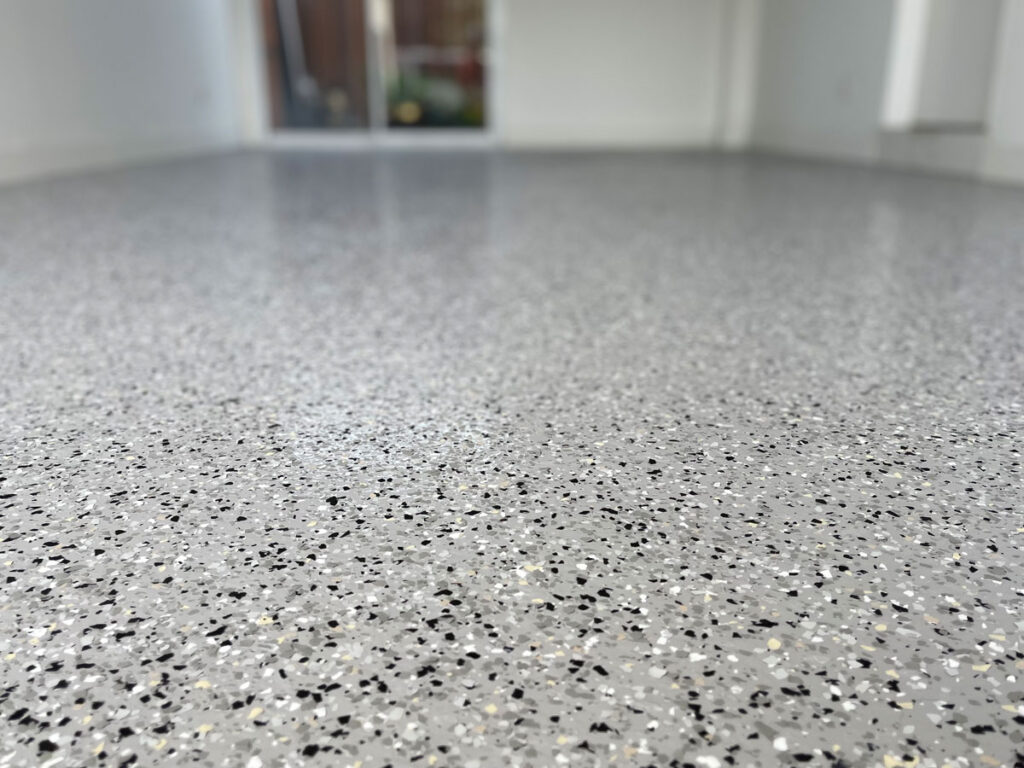
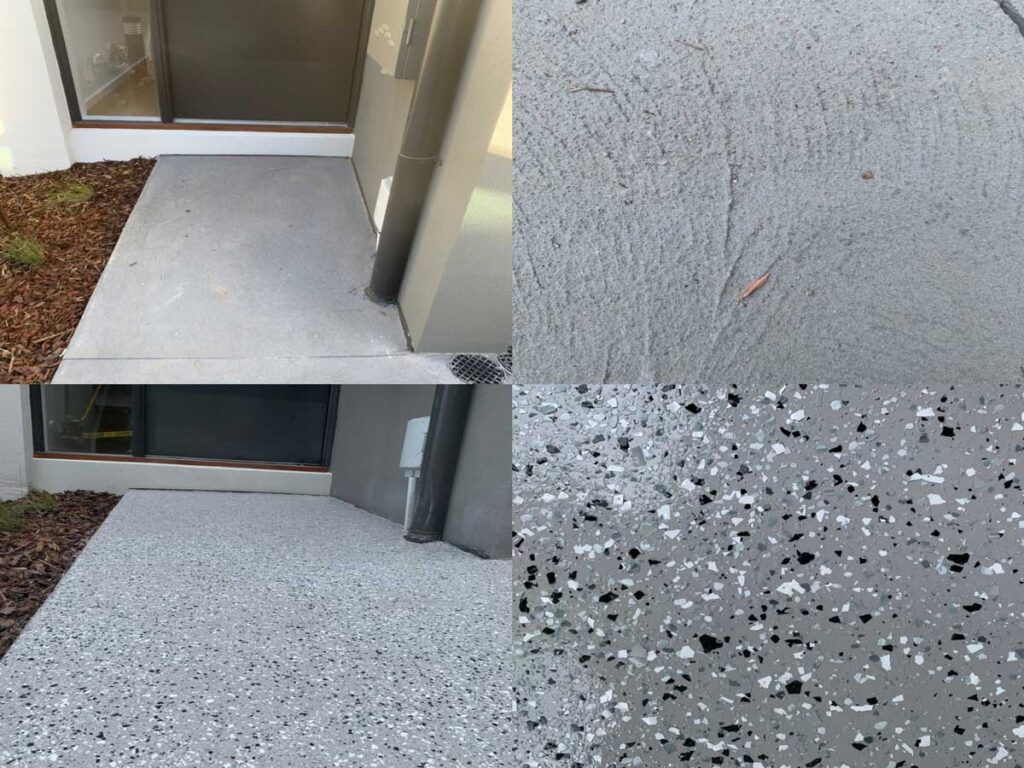
Finally, there is the metallic epoxy floor coating. It’s a multi-layer coating system that contains a metallic additive. Metallic pigments are spread using a roller or brush and are then twisted and turned to achieve the “swirling effect.”
FAQs On How To Apply An Epoxy Garage Floor Coating
Where Do You Begin?
Epoxy Floor Coatings are a hot and confusing topic in the flooring industry. There is a lot of information about epoxy and concrete, much of which is misleading, so where do you start? What product is right for you, how do you apply it and are there any prior preparations or considerations you need to make? How do you even know who to trust to give you good information?
The fact of the matter is that plenty of businesses will be keen to sell you a flooring system that will fail; as long as they get paid, they don’t care what else happens.
They will make you sign on the dotted line, absolving themselves of any liabilities on their part and then they disappear, leaving you with the cost of removing their terrible craft and reinstalling the floor you wanted. It’s a nightmare, and we have heard this story too many times to stay quiet about it.
Below are some key questions you need to ask yourself before ringing around for quotes, as well as some key questions for the businesses you request quotes and advice from. These questions will help you to determine where all the costs will be coming from and how much time and effort you can expect will be needed to install your new flooring.
What’s On The Floor Currently?
Before you even think of your final look, look first at your current flooring. If you currently have tiles, vinyl or paint on your concrete, this will need to be either removed completely or ground back to be level and rough or porous enough for the epoxy floor coating to create a permanent bond with the substrate.
Bear in mind, too, that removing tiles and other coatings can easily leave divots in the concrete that will need to be repaired before it is re-coated. These repairs will always show through if you finish the floor with a clear sealer or polishing.
Is The Condition Of Your Concrete Suitable For An Epoxy Floor Coating?
A common misconception is that all concrete is equal, and nothing could be further from the truth. If you have ever baked a cake or bread, you will know that following the recipe down to a T does not guarantee that your cake or loaf will turn out the same as the picture in the recipe.
Many, many conditions affect the outcome of concrete, which ultimately affect the final epoxy floor coating, such as temperature during curing, the temperature after curing, moisture levels beneath the surface and in the air, the mpa compressive strength, the materials used within the slab, the craft of the people who poured it and the amount of movement the slab experiences – among many other things!
In addition, concrete hardness can affect polish-ability; concrete under 23-25 mpa is more difficult and do not always achieve the desired result- however, fear not if this is what you’re after. There are always options for you.
So here are some guides on things to look for in your concrete before you can even begin to think of the final epoxy floor coating:
- Are there any visible cracks or divots on the floor? With clear coatings and polished concrete, you will have two choices, have the cracks highlighted to a colour, or leave them as they naturally are – concrete is a beautiful natural colour even with some cracks. For resurfacing systems, a high-grade crack repair is performed before flooring installation to minimise the chance of the cracks reoccurring.
- Has any moisture, oils or other liquids penetrated the concrete? Sometimes there are visible stains as a result.
- Are there expansion joints in the slab? Are you hoping for them to be filled in with the finished product? Not all expansion joints should be filled in.
- Is there obvious height differences on the floor? Using a 2m level on different floor areas is a quick way to answer that question.
Treating these issues in concrete is not automatically included in the cost of laying an epoxy floor coating.
Be aware that you may receive a quote for laying an epoxy floor coating, only to find the price increases later when the installer discovers issues in your concrete. These new costs will be covering the cost of extra materials and person-hours required to ensure the finished floor will not fail on account of a poor quality slab.
It’s only natural to be suspicious when this happens, but you should be more suspicious if your concrete slab shows any of the above conditions and the installer does not address them; in such cases, they have likely ignored the problems and just proceeded with the flooring installation, which will come back to hurt you long after the installer has left.
Is The Concrete Slab Level With The Rest Of The Flooring?
There are a few occasions when the concrete slab is lower than the flooring in neighbouring rooms/areas by 10mm or more.
This can result from old flooring being removed, or if the property is a new-build with allowances for screeding and falls to drains in a wet area, or sometimes it is just the result of an older property that was built in a time with different building standards. In such cases, the floor can be built up to be level with the rest through floor-levelling or screeding.
This will be an additional cost to the flooring installation, so be sure to mention it when requesting quotes so that all information is upfront from the beginning.
How Are You Going To Prepare The Floor For Permanent Adhesion Of The Final Epoxy Floor Coating?
There are several different ways you can prepare your surface for a coating to be laid on it, but one way that is never an option is no surface preparation at all! Not every form of surface preparation is appropriate in all situations. Sometimes even the highest quality option is too aggressive for your situation, and often the gentlest and cheapest is not aggressive enough to ensure your finished product does not delaminate.
Of course, if you want polished concrete, this is the most vital question of all! Some options for floor preparation include the following, from lightest to most industrial:
- Concrete Sanding
- Concrete Grinding
- Shot-Blasting
What Area Is Your Floor?
Get at least a rough m2 of the size of the are to be coated. If you don’t have the right equipment or know-how to measure your floor, you can follow our simple guide, ‘How to measure your floor’, for assistance. When receiving final quotes on your flooring, someone should visit your property to measure for themselves properly and visually inspect any concerns. Proceed with caution if this is not the case.
What’s Your Budget?
This is often the number one thing on people’s minds when obtaining a quote. Remember that in this industry, the price reflects the performance and longevity of the product.
Be very cautious of epoxy coatings and paints that come with a stock-standard price per square metre. While this is exactly the kind of information everyone wants, the complexities of installing chemical-reactive flooring make it practically impossible to have any ‘one-size-fits-all’ option.
If you choose the ‘off-the-shelf’ option, you will probably save a few dollars now but will not gain the longevity and performance of a permanent concrete coating system. If you’re playing a long game, the customised quotes are the ones you’re looking for.
How Is Your Epoxy Floor Going To Be Used?
What is your intention for the long-term use of the floor? The great thing about concrete floor coatings such as epoxies, polyurethanes, polyaspartic, polyurea and Methyl Methacrylate (MMA) is that they are highly versatile and customised to suit your requirements. So naturally, these requirements will affect the kind of floor coating you need. Some of the main questions you need to ask are as follows:
- What kind of foot/vehicle traffic are you expecting? The higher the traffic, the more hard-wearing the resin needs to be.
- Do you need your floor to be food-safe or HACCP Accredited?
- Will strong chemicals be dropping on the floor?
- Do you require the floor to be non-slip?
- Will you need safety or line-marking?
- Will there be direct sunlight hitting the floor, even though a window?
- Will the floor come into contact with high volumes of water, such as wash-downs or rain?
- Are there drains? Do they have falls, or do you require drains to be created? How many drains are there, and what kind of drains are they?
All of these factors affect the amount of resin required (particularly when it comes to falls to drains), which additives need to be included, and ultimately which type of resin you need because not all additives play nicely with each other. Sometimes these additives can come free of charge but don’t necessarily come stock-standard, so make sure you articulate these things clearly.
Pros And Cons Of Expoxy Flooring
Every type of flooring comes with its set of pros and cons. Here’s a quick overview of its advantages and disadvantages to learning if epoxy is right for you.
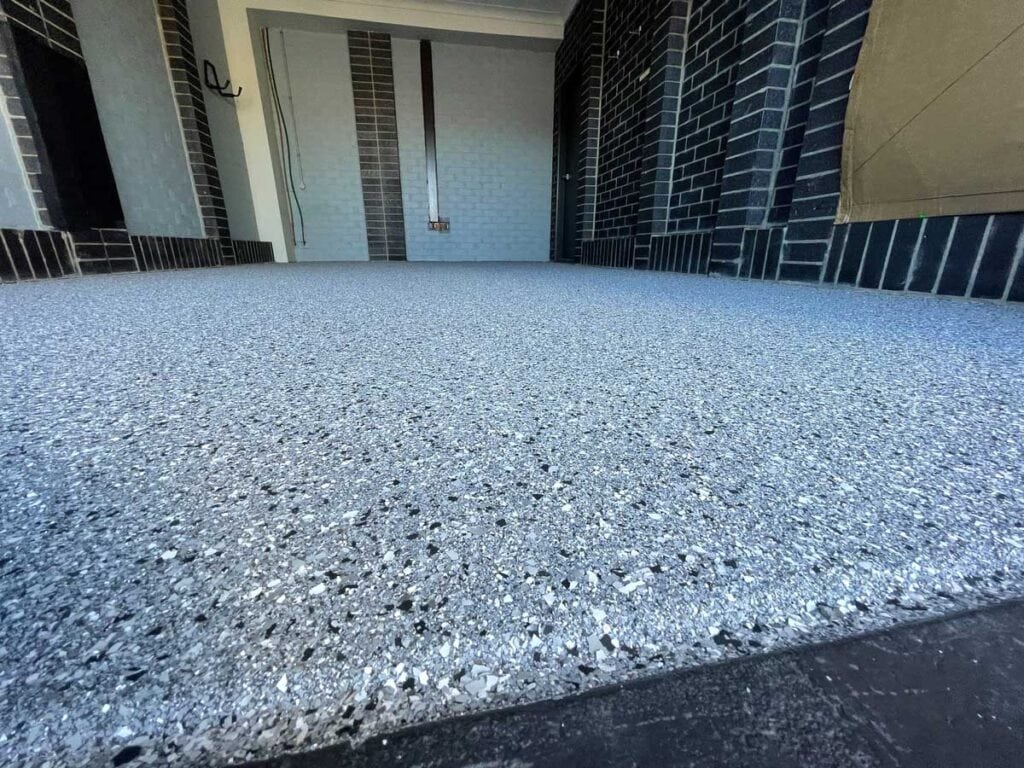
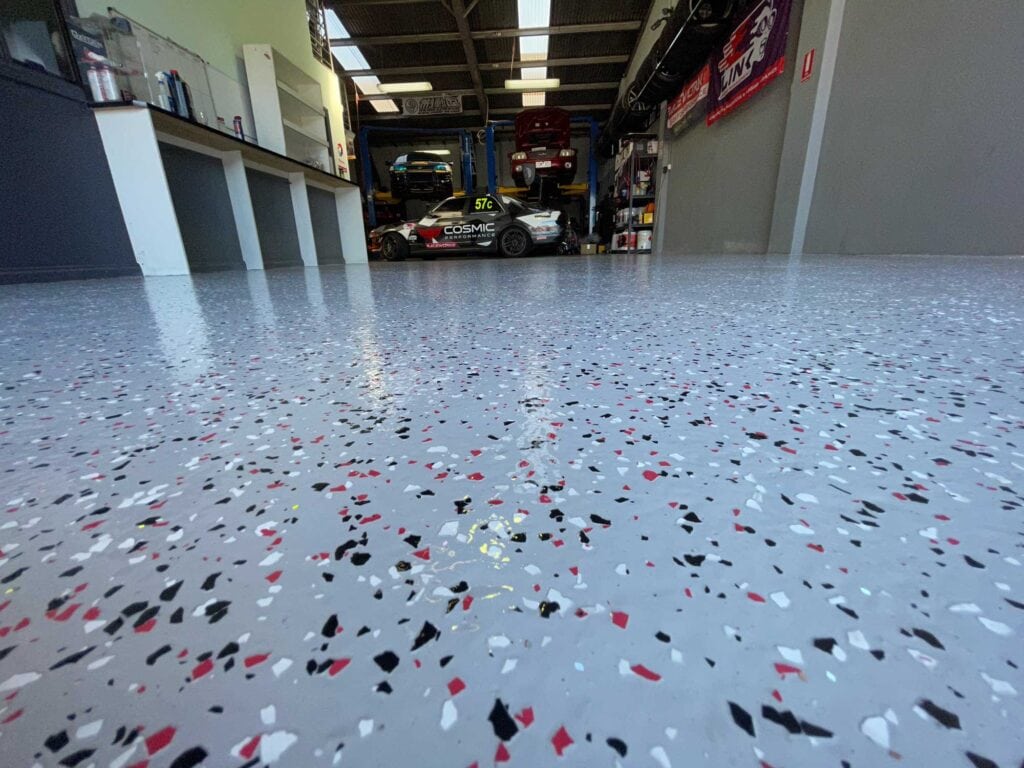
- Aesthetics: Epoxy’s glossy finish makes it exceptionally appealing. You can also experiment with various colours to complement the design of the room you’re applying it to.
- Cost savings: Epoxy flooring is usually cheaper than other types of flooring but by how much? According to hipages, epoxy flooring costs $AUD30 to $AUD35 per sqm. Those who want a decorative finish need to spend about $AUD80 to $AUD100 per sqm. Compare this with vinyl tiles, which cost about $AUD40 to $AUD100 per sqm, or ceramic tiles, which cost $AUD90 to $AUD125 or more.
- Resistant: Epoxy flooring is as tough as it gets. It’s resistant to oil, gas, bleach and other chemicals. You don’t have to worry about staining them in case you spill a few drops of oil in your garage. It’s also resistant to bacteria and germs, making it quite easy to clean. It’s for these reasons that you’ll usually find epoxy flooring in medical facilities.
- Longevity: Epoxy flooring lasts decades without cracking and peeling when applied correctly. It’s also strong enough to endure heavy traffic.
- Semi-permanent: Epoxy’s longevity is both a blessing and a curse. Removing and updating the epoxy coating is a costly and labour-intensive process.
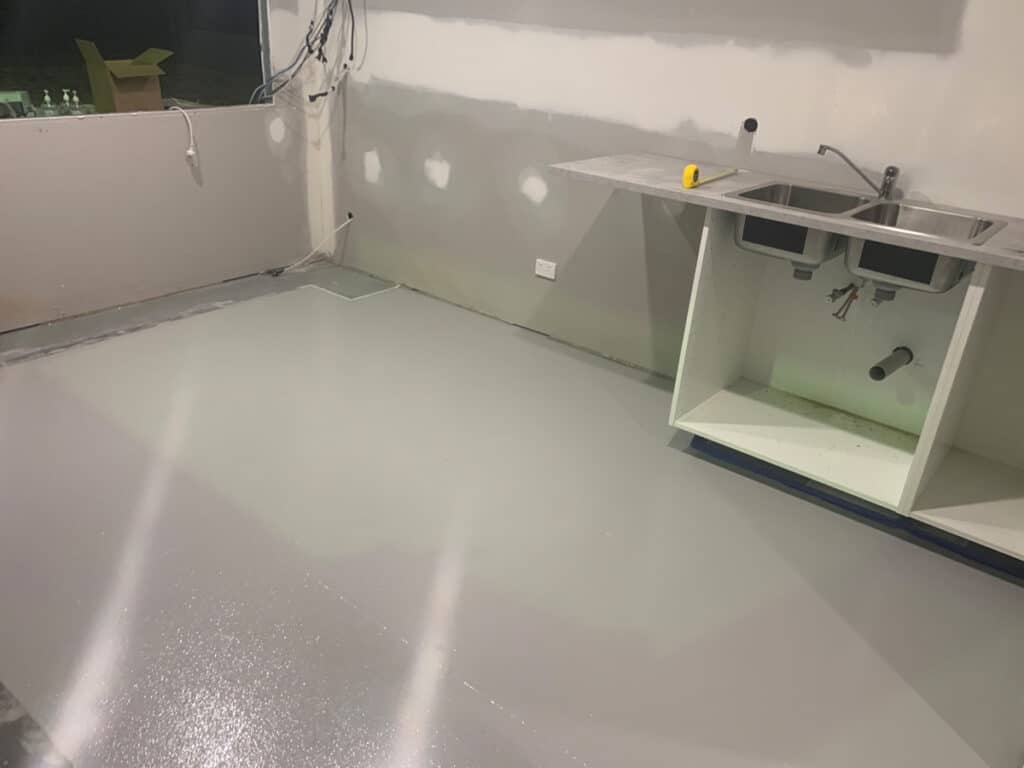
How To Apply Epoxy Flooring
Applying epoxy requires thorough preparation. Be patient with cleaning the concrete surface to ensure that the paint adheres well.
Prepare Materials
You can buy do-it-yourself epoxy flooring kits from home improvement stores. They’ll include primer, epoxy and decorative flakes. Here’s a list of all the products and tools you’ll need if you prefer to buy materials individually.
- Two-part epoxy paint
- Buckets
- Cleaning/degreasing solutions
- Rubber gloves
- Respirator
- Rubber boots or spiked shoes
- 32% muriatic acid
- Hand grinder or scraper
- Concrete fillers (if there are cracks)
- Wet-dry vacuum
- Paintbrushes
- Stiff-bristle brush
- Power scrubber with a brush attachment
- Duct tape
- 9-inch paint roller
Diy Epoxy Flooring Application
- Using a hand grinder or scraper, smoothen the concrete surface. Sweep or vacuum the dust away.
- Fill in any cracks and imperfections. Get rid of all the dust.
- Spray the entire floor with water. Then, use a power scrubber and a degreasing solution to clean the area. Use a brush to scrub corners that the machine can’t touch. Once the floor is clean, use a wet-dry vacuum to clean it up.
- Pour 12 ounces of 32% muriatic acid in a bucket filled with 15 cups of water. Sprinkle the mixture evenly.
- Sprinkle the acid mixture over a 10x10 foot area and scrub it for 10 minutes using a long-handled brush. Once you’re done, rinse three times to ensure that the acid is completely gone.
- Wait overnight and ensure that the surface is dry.
- Mix epoxy and solvent or water according to the manufacturer’s instructions. Pour the epoxy solution into a second bucket to ensure thoroughly incorporated the liquids.
- Apply duct tape directly beneath the door and perimeter. Using a hand brush, line the borders with epoxy.
- Start painting the rest of the area with a roller brush.
- Once your first coat is dry, apply a second coat. Apply anti-slip coatings or flake epoxy chips if desired.
- Paint the bottom 4 inches of your walls. This will act as a protective base.
Safety Tips
There are some important safety tips to follow in this project involving hydrochloric acid and epoxy. First, always wear the appropriate personal protective equipment and not smoke while working on this project. Turn off the gas to your water heater or any other appliances in the garage. Keep the garage well ventilated while applying the epoxy. Also, take precautions to keep children and pets away from the garage and driveway while you’re working.
Handy Hints
Always use premium lint-free rollers for a blemish-free coating. Having an extra roller is also a good idea. Store your epoxy materials in a cool area 24 hours before mixing because a cooler epoxy will help increase the working time. Also, check for moisture in the concrete by taping a heavy-duty garbage bag over the centre of the floor. After 24 hours, lift one corner of the bag to see if it’s wet underneath. If it is, the epoxy will not hold, and you will require professional help or a new floor.
Check Your Concrete Is Sealed
Sprinkle a small amount of water onto the concrete. If the water beads, a sealer has been used and must be removed before applying the epoxy coat. If the water absorbs into the concrete, then it isn’t sealed.
Pressure Clean The Garage Floor
Use a high-pressure cleaner to clean all garage floors, including the corners. Make sure you wear protective shoes while you work. We used a high-pressure petrol cleaner, which is best to keep outside to stop the build-up of petrol fumes. After cleaning it, use a stiff-bristled brush to sweep away excess water and any debris.
Acid Wash The Floor
- Before working with the hydrochloric acid:
- Put on your gloves, safety glasses, respirator, long pants and boots.
- Read the instructions to get the right ratio of acid to water.
- Carefully pour the acid into the bucket containing water.
- Dip the stiff-bristled brush in the mixture and scrub the garage floor.
Hose Down The Floor
After acid-washed the garage floor, hose it down to clean away any acid and debris. Leave the floor to dry for at least 24 hours.
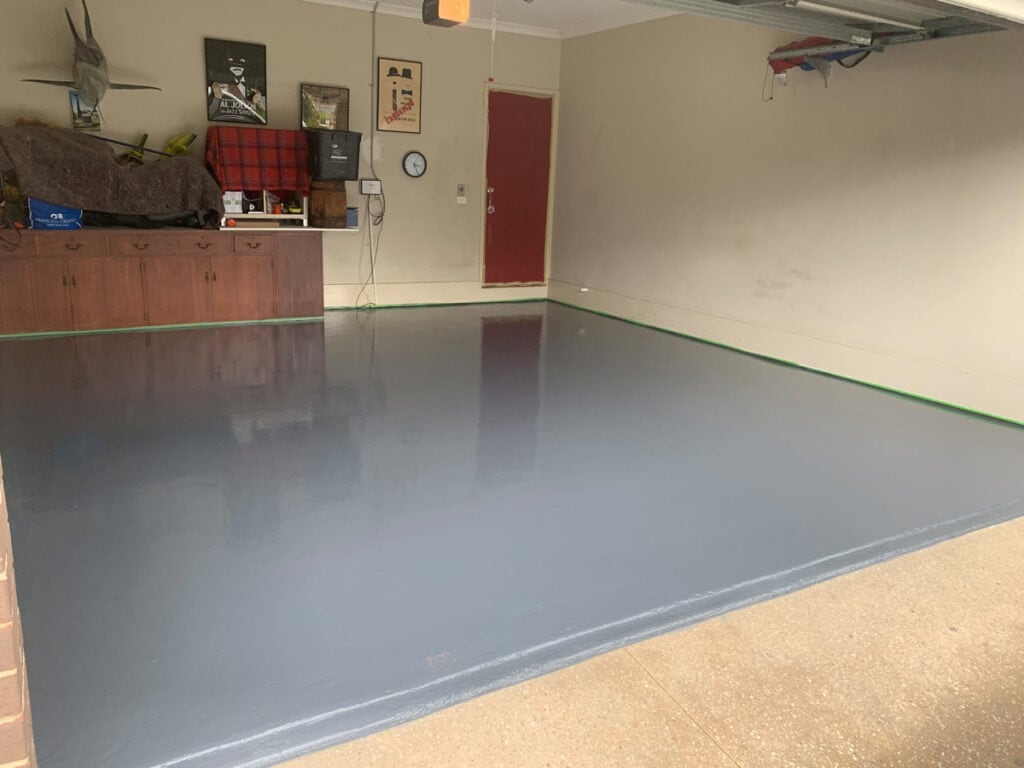
Tape Up The Walls
Once the garage floor is dry, stick the painter’s tape where the walls meet the garage floor. This will protect them from being coated in epoxy.
Mix The Epoxy
Make sure you read the instructions before mixing the epoxy. Also, put on your safety gloves, glasses and respirator. Next, pour the contents of the small can into the large can and mix the epoxy thoroughly. Once your two epoxy chemicals are mixed, immediately start applying them to the floor.
Cut In The Edges Of The Floor
Cut in the edges of the floor.
Roll On The Epoxy
After you have cut in, paint the rest of the floor with the roller. Again, using a roller on the pole will make the job easier. Move at a steady pace, and you should finish a two-car garage floor in less than one hour. A handy tip is to listen to the sound of the roller; a quiet roller means the epoxy is going on thick while a loud roller means it’s going on thin.
Apply The Flakes
You can apply the flakes to the epoxy floor after you have painted 1m2 of the floor. This way, you can reach over and sprinkle the flakes over the area. Stop applying the flakes every time you’ve painted 1m2. Instead, continue painting and applying the flakes until the job is done.
Let The Floor Dry
Depending on the temperature and humidity, an epoxy floor will be dry to the touch in a couple of hours. Make sure you wait overnight before walking on it. Depending on the epoxy label directions, you can start parking your cars on the floor in about three to seven days. A full cure for the floor takes around one month. All you need to do now is take care of it, and your garage floor will look good for years to come.
Benefits Of An Epoxy Coating For A Garage Floor
When used on the floor as garage concrete paint epoxy, the coating can provide a wide range of benefits. They include improved:
Appearance
A garage floor epoxy coating can dramatically improve its appearance by giving it a smooth, shiny, aesthetically-pleasing look.
Affordability
The epoxy coating is relatively inexpensive and only requires one coat to provide full coverage and protection benefits.
Durability
An epoxy coating is durable enough to protect garage floors from wear and damage from car tires, foot traffic, spills, moving equipment and tools and more.
Longevity
Epoxy floor coatings can last for up to 30 years. Some say it lasts a lifetime.
Protective
A thick coat of epoxy can protect any garage floor from spills, scratches, cracks and much more.
Resistant
An epoxy coating resists dramatic temperature swings, heavy equipment, rubber tires, inclement weather, corrosive chemicals and cracking when heavy items fall on it.
How To Hire A Flooring Professional?
Not everyone can do DIY epoxy floor installation. If the task is too large, hire a flooring expert. When looking to hire a professional to put down an epoxy coating on your garage floor, ask family, friends and neighbours for referrals. You can also research the internet or ask for recommendations at local hardware stores that sell epoxy flooring supplies.
Licensing And Qualifications
Ensure the person you choose to put down the epoxy coating on your garage floor has the proper license and qualifications.
Conclusion:
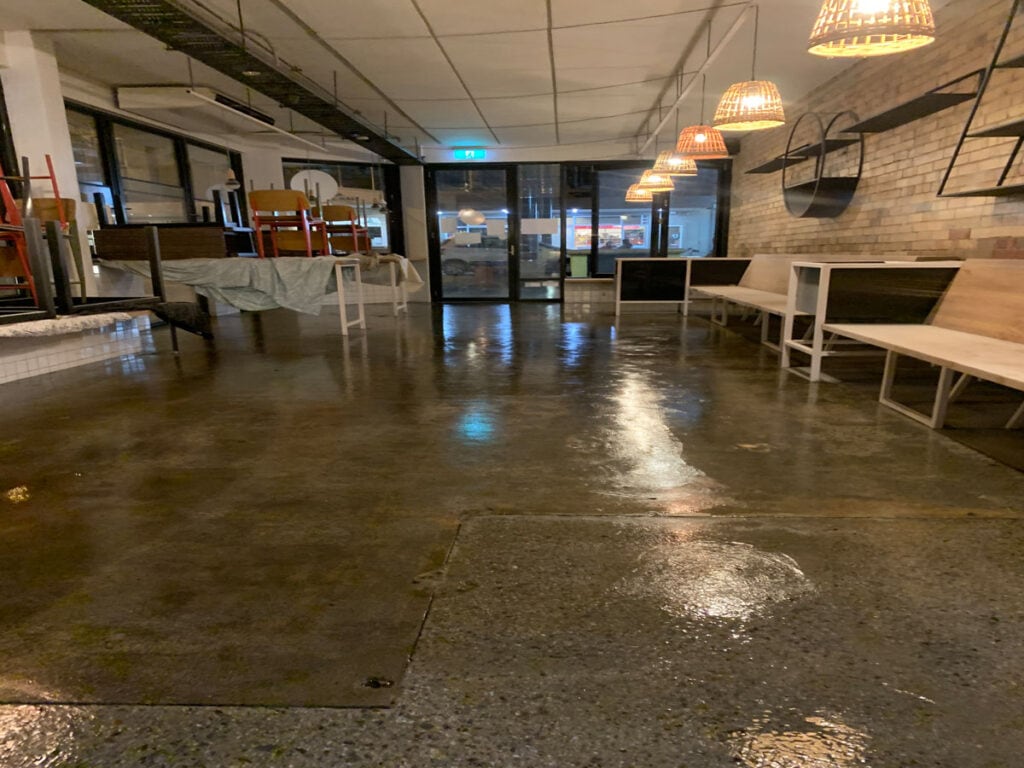
If you are more interested in a stunning designer floor, you also have many options to choose from. See our designer range of flooring. In our experience, the designer finish that is often most disappointing is the mirror-like, high-gloss flooring. High-gloss floors look incredible, as though you could fall right into them, but they are very high maintenance.
This floor is still a great option for an upmarket hotel or boutique shop with a full-time maintenance employee to keep the floor up to standard. For your average residence, cafe or any other establishment that does not have the time or resources for this kind of maintenance, matte and satin-finish floors will retain their original beauty for a fraction of the time and cost in maintenance.
Frequently Asked Questions About Epoxy Floors
Typically, epoxy flooring lasts 2 to 3 years in heavy traffic. Commercial properties—like garages, restaurants, or factory spaces—with lots of daily foot traffic can expect this experience. However, with proper care and maintenance, your epoxy flooring may last much longer.
- Strong Application Fumes. During the epoxy application process, wet epoxy gives off an unpleasant smell. ...
- Long Curing Time. ...
- Slippery When Wet. ...
- Economical Flooring Choice. ...
- Resistant to Damage. ...
- Weather-withstanding. ...
- Aesthetically Pleasing. ...
- Protects and Decreases Wear & Tear.
Extremely safe – Epoxy is a very safe coating for your hard floors. It's slip resistant, shock resistant, and less abrasive than concrete and other types of industrial flooring. ... It can also withstand heat of up to 200 degrees, making it a better choice than most other types of flooring when it comes to fire resistance.